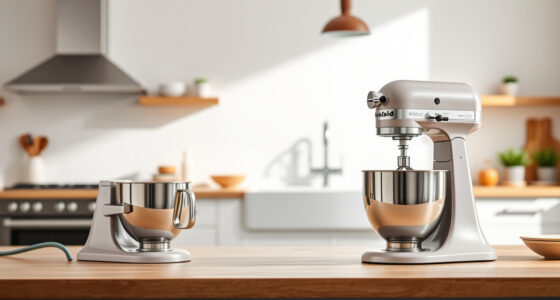

If your KitchenAid Artisan Series 5 Quart Tilt Head Stand Mixer is leaking oil, it can be concerning and may affect its performance. While these mixers are built to last, internal issues like oil leaks can occur over time. Understanding the common causes and safe fixes can help you restore your mixer to optimal working condition without costly repairs or replacements.

Get home appliances delivered free with Prime
- Fast, free delivery on millions of items
- Prime Video, Amazon Music and more included
- Member-only deals all year
In this guide, we’ll walk through step-by-step troubleshooting, identify potential causes of oil leaks, and provide practical, safe solutions to fix them. Whether your mixer is leaking from the head, the base, or the attachment hub, you’ll find straightforward advice to resolve the issue effectively.
Key Takeaways
| Common Causes | Oil leaks often result from worn seals, overfilled gear cases, or improper assembly. |
| Safety First | Always unplug your mixer before attempting repairs to avoid electrical hazards. |
| Routine Maintenance | Regularly inspecting and cleaning your mixer can prevent leaks. |
| When to Seek Professional Help | If the leak persists after troubleshooting, consider professional repair. |
Understanding Why Your Mixer Leaks Oil
Oil leaks in your KitchenAid Artisan Series mixer usually stem from internal issues such as worn seals, overfilled gear cases, or improper assembly after cleaning or maintenance. The gear case contains lubricating oil essential for smooth operation. If the seals that contain this oil wear out or become damaged, oil can escape, leading to leaks. Additionally, overfilling the gear case during maintenance can cause excess oil to seep out.
Another common cause is improper reassembly after cleaning or repairs, which may prevent seals from fitting correctly. Recognizing the signs of a leak—such as oil on the mixer’s exterior, a burning smell, or decreased performance—can help you address the problem early and prevent further damage.
Step-by-Step: How to Fix an Oil Leak in Your KitchenAid Mixer
- Unplug the Mixer: Always disconnect the power before starting any maintenance to ensure safety.
- Remove the Attachments and Bowl: Detach the mixing bowl and any attached accessories to access the head and gear area.
- Inspect for Visible Leaks: Look around the head, gear case, and attachment hub for signs of oil or residue.
- Access the Gear Case: Loosen and remove the screws holding the top cover of the gear case (refer to your model’s manual). Be cautious of any oil that may leak during this step.
- Check Seals and Gears: Examine the seals for cracks or wear. If they appear damaged, replace them with compatible seals designed for your model.
- Refill or Replace Oil if Necessary: If the oil level is low or overfilled, drain the excess or refill with the recommended lubricant for your mixer.
- Reassemble Carefully: Ensure all components are correctly fitted and sealed before reattaching the cover and tightening screws.
- Test the Mixer: Plug in and run the mixer at a slow speed to check for leaks. Observe closely and stop immediately if leaking occurs.
Tips and Precautions for Safe Maintenance
- Use the Right Lubricant: Always use the manufacturer-recommended oil to prevent damage or further leaks.
- Handle Seals with Care: Be gentle when replacing seals to avoid damaging the gear components.
- Avoid Overfilling: Fill only to the manufacturer’s specified level to prevent excess oil from escaping.
- Keep the Mixer Clean: Regularly wipe down the exterior and check for signs of leaks to catch issues early.
- Consult a Professional: If you’re unsure about the repair process or if the leak persists after troubleshooting, seek assistance from a qualified appliance technician.
When to Replace Your Mixer or Seek Professional Help
If, after following these steps, your KitchenAid stand mixer continues to leak oil despite seal replacements and proper maintenance, it may be time to consult a professional. Persistent leaks could indicate internal damage or worn components that require specialized repair or part replacement. Keep in mind that attempting further disassembly without proper tools or expertise can risk voiding your warranty or causing additional damage.
In some cases, replacing the entire gear case assembly might be the most cost-effective solution, especially if the mixer is older or extensively worn. Always weigh the cost of repairs against replacing the unit, especially considering the mixer’s age and usage history.
The Products in This Guide

KitchenAid Artisan Series 5 Quart Tilt Head Stand Mixer
- ✔ Weight: 26 lbs
- ✔ Dimensions: 14 x 8 x 14 inches
- ✔ Power: 325 Watts

KitchenAid Stand Mixer Attachment
- ✔ Color: Metallic
- ✔ Number of Plates: 3
- ✔ Includes Storage: Yes
KitchenAid Artisan Series 5 Quart Tilt Head Stand Mixer
The KitchenAid Artisan Series 5 Quart Tilt Head Stand Mixer is built with high-quality metal construction, offering durability and excellent mixing results. Its tilt-head design allows easy access to the bowl, making it convenient for regular use and maintenance. While oil leaks are rare, understanding how to troubleshoot them can extend the life of your mixer.
Pros:
- Durable metal construction
- Easy tilt-head access
- Powerful 10-speed motor
- Large 5-quart bowl
Cons:
- Oil leaks can occur if seals wear out
- Requires regular maintenance
- Heavy for some users
Best for: Home bakers and cooking enthusiasts looking for a reliable, stylish stand mixer.
Not ideal for: Professional high-volume bakeries or those seeking a lightweight option.
Bottom line: A durable, high-performing stand mixer with potential for minor leaks, easily fixed with proper maintenance.
KitchenAid Stand Mixer Attachment
The KitchenAid Metal Food Grinder attachment turns your stand mixer into a versatile food processor, perfect for fresh grinding and sausage making. Its durable construction and included grinding plates make it a valuable addition for home chefs.
Pros:
- Sturdy metal build
- Multiple grinding plates
- Easy to attach/detach
- Large food tray
Cons:
- Requires separate purchase
- Cleaning can be time-consuming
- Bulkier attachment
Best for: Creating fresh ground meats, vegetables, or making sausages at home.
Not ideal for: For users who rarely grind ingredients or have limited kitchen space.
Bottom line: A robust attachment that expands your mixer’s functionality for fresh, homemade foods.
Frequently Asked Questions
Can oil leaks damage my KitchenAid stand mixer?
While minor oil leaks typically don’t cause immediate damage, prolonged leaks can lead to internal parts wearing out faster or causing motor issues. It’s best to address leaks promptly.
Is it safe to continue using my mixer if it leaks oil?
It’s generally safe to use the mixer temporarily but avoid prolonged use until the leak is fixed to prevent further internal damage or contamination.
How often should I check for oil leaks?
Regularly inspect your mixer after each few uses, especially if you notice unusual smells, noise, or the presence of oil on the exterior.
Do I need special tools to fix an oil leak?
Basic tools like screwdrivers are usually sufficient. For replacing seals or internal parts, refer to your model’s manual or consider professional help.
Can I repair my mixer myself if I have no experience?
If you’re comfortable with small appliance repairs and follow safety precautions, you can attempt basic fixes. Otherwise, seeking professional repair is recommended.
Keep Your KitchenAid Running Smoothly
Addressing oil leaks in your KitchenAid Artisan Series stand mixer is manageable with proper care and attention. Regular maintenance, timely seal replacements, and cautious reassembly can prevent leaks and prolong your mixer’s lifespan. Remember, safety comes first—if unsure, always consult a professional technician to handle internal repairs. With these tips, you can keep your mixer performing at its best for years to come.
Affiliate disclosure: As an Amazon Associate we earn from qualifying purchases. Prices and availability are accurate as of the time of publishing.
Halloween Picks
halloween
As an affiliate, we earn on qualifying purchases.