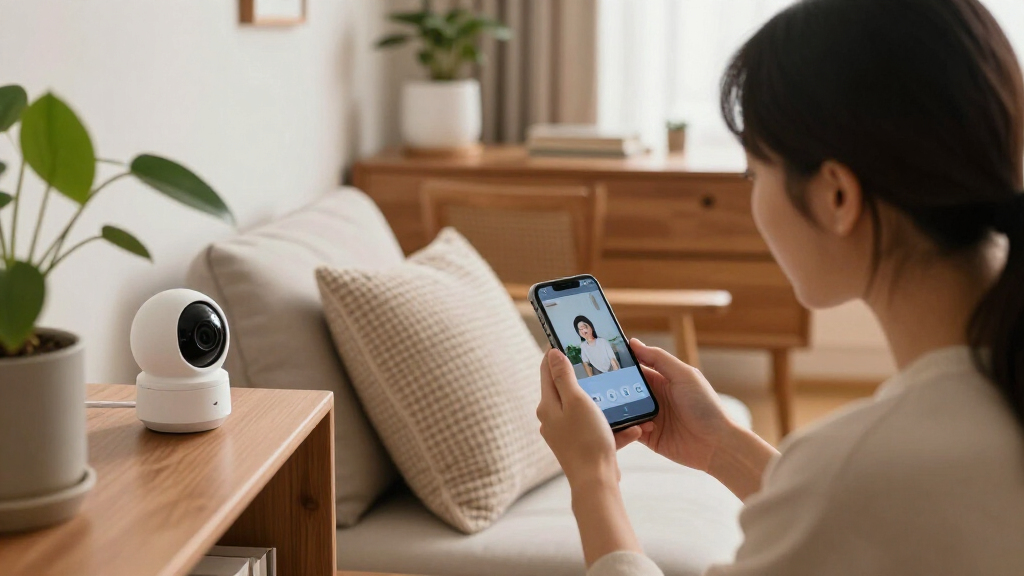

Set up smart home security cameras to monitor chosen areas, receive useful alerts, and review live or recorded footage from your phone. This guide is for homeowners and renters who can use a smartphone and follow basic device setup instructions; no wiring experience is needed for plug-in or battery-powered models. Allow 1-3 hours, depending on the number of cameras and whether you need to mount them.

Get home appliances delivered free — and shop member deals
- Fast, free delivery on millions of items
- Access to Prime Big Deal Days deals on October 6–7
- Prime Video, Amazon Music and more included

Blink Outdoor 4 Wireless Smart Security Camera System (5 Cameras)
- ✔ Camera count: 5
- ✔ Camera resolution: 1080p HD
- ✔ Field of view: 143° diagonal
Blink Outdoor 4 Wireless Smart Security Camera System, 3 Cameras, 2-Year Battery Life
- ✔ Camera count: 3
- ✔ Video resolution: 1080p HD
- ✔ Battery life: Up to 2 years, as stated
Blink Outdoor 4 Wireless Smart Security Camera System (2 Cameras, Sync Module Core)
- ✔ Camera count: 2
- ✔ Video resolution: 1080p HD
- ✔ Battery life: Up to 2 years, as stated
Difficulty: Beginner | Time: 1-3 hours
What You’ll Need
Tools & Materials:
- Smartphone or tablet with the camera maker’s app installed
- Smart home camera or cameras, power adapters, and any included mounting hardware
- Home Wi-Fi network name and password
- Drill and suitable drill bit, screwdriver, and wall anchors if mounting cameras
- Ladder if needed, used on stable ground with a spotter when practical
Knowledge:
- Basic smartphone app use
- Ability to connect a device to Wi-Fi
- Basic understanding of which areas you want to monitor
Check that each camera works with your Wi-Fi band and phone before opening or mounting it. Many cameras need 2.4 GHz Wi-Fi during setup; some also support 5 GHz. Confirm whether recording requires a subscription, local storage card, or hub. If you rent, get permission before drilling. Do not place cameras where they capture neighbors’ private spaces, bathrooms, or other areas where people expect privacy.
Blink Outdoor 4 Wireless Smart Security Camera System (5 Cameras)
When we want one bundle to watch several sides of a home, the five-camera Blink Outdoor 4 system is the most capable fit in this lineup. It can be placed across multiple entrances and exterior areas without mixing camera models or setting up separate systems. That coverage advantage matters more than an incremental feature difference here: the core 1080p live view, infrared night vision, two-way audio, and Alexa support are shared with the two- and three-camera bundles.The system’s wireless design and claimed battery life of up to two years suit locations where running power would be difficult. Enhanced motion detection can flag activity, while person alerts are an optional subscription feature rather than an included benefit. The broad 143-degree diagonal field of view may help a single camera take in more of an approach, but it does not replace thoughtful placement or guarantee every blind spot is covered. We should also note that the included Sync Module Core does not bring local storage; buyers need to look into optional storage accessories or cloud storage.Compared with the three-camera bundle, this package is more appropriate when the property genuinely needs extra viewpoints, not simply because more cameras sound reassuring. Compared with the two-camera system, it reduces the likelihood of needing to add coverage immediately, but also creates more devices to place and manage. Its non-rechargeable AA lithium batteries are another practical consideration: fewer expected changes than frequent-charging designs, but eventual replacement remains part of ownership.
Pros:
- Five cameras offer the broadest coverage of these three bundles.
- 1080p live view, infrared night vision, and two-way audio support day-to-day monitoring.
- Wireless placement and a stated battery life of up to two years can reduce installation and upkeep demands.
- Alexa compatibility and an included Sync Module Core support a coordinated setup.
Cons:
- Local storage is not included with the Sync Module Core.
- Person alerts require an optional subscription.
- Non-rechargeable batteries eventually need replacing in each camera.
Best for: Households that want to monitor several entrances or exterior zones with one coordinated wireless system.
Not ideal for: Small homes needing only one or two viewpoints, or buyers who want local recording included without purchasing additional storage options.
Bottom line: We recommend the five-camera bundle when broad outdoor coverage is the priority and its storage limitations are acceptable.
“We recommend the five-camera bundle when broad outdoor coverage is the priority and its storage limitations are acceptable.”
Blink Outdoor 4 Wireless Smart Security Camera System, 3 Cameras, 2-Year Battery Life
The three-camera Outdoor 4 system is our balanced pick for homes where two viewpoints feel limiting but five would be unnecessary. A third camera can give a household more flexibility to cover another door, a garage approach, or a side path, while keeping the system smaller than the broad-coverage bundle. Since its core camera features match the other options, this choice is primarily about selecting a useful footprint rather than paying for a different level of video capability.We get 1080p live video, infrared night vision, two-way audio, motion detection, and Alexa integration, along with a Sync Module Core and the listed installation accessories. The advertised battery life of up to two years supports a lower-maintenance approach than cameras that need frequent charging, although battery life is a claim rather than a guarantee for every installation. As with the other bundles, person alerts require an optional subscription, and the included module does not supply local storage by itself.Compared with the two-camera package, this bundle is better suited to a home with three distinct monitoring priorities, rather than just a front and rear entrance. Compared with the five-camera system, it avoids deploying cameras in marginal locations simply to use a larger kit. Its listing provides fewer detailed specifications than the five-camera set, so buyers who need precise information about dimensions or network requirements should confirm compatibility before committing. This is the most sensible middle option when the property layout clearly calls for a third view.
Pros:
- Three cameras create a practical middle ground between the two- and five-camera systems.
- Includes 1080p HD video, infrared night vision, and two-way audio.
- Wireless installation and stated battery life of up to two years suit locations without convenient power.
- Alexa compatibility makes it a straightforward match for an existing Alexa-centered home.
Cons:
- Sync Module Core does not include local storage.
- Person detection alerts require an optional subscription.
- Additional storage options are sold separately.
Best for: Households that need three key outdoor viewpoints and want a middle-ground system rather than the smallest or largest bundle.
Not ideal for: Buyers with many separate areas to monitor, or those who require local recording and person detection without extra costs.
Bottom line: We would choose the three-camera system when a home needs a third angle but not the full coverage of the five-camera bundle.
“We would choose the three-camera system when a home needs a third angle but not the full coverage of the five-camera bundle.”
Blink Outdoor 4 Wireless Smart Security Camera System (2 Cameras, Sync Module Core)
For a first camera system or a compact home, the two-camera Outdoor 4 bundle keeps the setup focused. It is well suited to covering two priority areas, such as a front entrance and a back door, without placing extra cameras where they may add little value. The camera experience is broadly the same as the larger bundles: 1080p HD video, infrared night vision, two-way audio, motion detection, and Alexa voice control.This smaller kit still includes the Sync Module Core and mounting accessories, and its wireless, long-battery-life design can be useful where outlets are scarce. However, buyers should not confuse a smaller starting system with a complete answer for every property. If the home has a side entrance, detached garage, or several approaches, the three-camera package is more flexible from the outset. Adding cameras later may be preferable for a buyer who wants to build gradually, but the listing does not remove the storage decision: local storage needs optional accessories, and person alerts require a subscription.Compared with the five-camera system, this is the simpler choice to place and manage, but it naturally offers fewer simultaneous viewpoints. Compared with the three-camera system, it is the better match for a modest footprint or a buyer who wants to validate a two-location setup first. We would skip it if the goal is broad perimeter monitoring or if the expectation is that person detection and local recording come ready to use without additional plans or hardware.
Pros:
- Two cameras make for a focused entry-level system for a small property.
- Provides 1080p HD live view, infrared night vision, and two-way audio.
- Wireless installation and stated battery life of up to two years can suit hard-to-wire locations.
- Alexa compatibility supports voice control in compatible homes.
Cons:
- Two viewpoints may not cover homes with several important entrances.
- Local storage requires optional accessories.
- Person alerts require an optional subscription.
Best for: First-time camera buyers and residents who have two clear priority locations to monitor.
Not ideal for: Large properties, homes with three or more important approaches, or buyers who expect included local storage and subscription-free person alerts.
Bottom line: We recommend the two-camera bundle for a small, clearly defined monitoring plan, not as a substitute for broad property coverage.
“We recommend the two-camera bundle for a small, clearly defined monitoring plan, not as a substitute for broad property coverage.”
As an Amazon Associate we earn from qualifying purchases.
Before You Start
Choose camera locations before fixing any hardware in place. Check the manufacturer’s instructions for power, weather ratings, Wi-Fi requirements, and mounting limits. Keep outdoor power connections protected as directed by the manufacturer; never use indoor-only equipment outdoors. Use a unique password for the camera account, turn on two-factor authentication if available, and install app or camera updates before relying on the system. If the camera connects through a hub, set up the hub first.
Step-by-Step Instructions
Step 1: Map the areas to monitor
Walk through your home and list the specific areas you want to see, such as an entryway, driveway, or shared living space. Mark likely camera positions on a simple sketch. Aim to cover approaches and important access points rather than recording every room. For each proposed location, check whether the camera would capture a neighbor’s window, a public area more than needed, or a space where household members expect privacy. Adjust the angle or choose another location to limit the view.
Tip:Tell household members where cameras are placed and when they record. Check local rules about recording audio, especially in shared or outdoor spaces.
Check: You have a short location list, and each camera has a clear purpose and a privacy-conscious field of view.
Step 2: Check power and Wi-Fi at each location
Take your phone to each planned position and check that it has a dependable connection to your home Wi-Fi. If the camera app offers a signal test, use it. For a battery model, identify how you will reach it for charging. For a plug-in model, confirm that an outlet is close enough and that the cable can be routed without becoming a trip hazard or pinching risk. For outdoor use, confirm that the exact camera model and power accessories are rated for the conditions where they will be installed.
Tip:A phone showing Wi-Fi bars does not guarantee a camera will connect well. Test the camera temporarily at the intended position before drilling or attaching permanent mounts.
Check: Every planned position has a workable power method and a Wi-Fi signal that the camera can use reliably.
Step 3: Prepare accounts and update the equipment
Install the official camera app from your phone’s app store and create or sign in to your account. Use a unique password that you do not reuse on other services, then enable two-factor authentication if the app supports it. Connect the camera to power and follow the app’s pairing instructions. If the app prompts you to update the camera, hub, or app, complete the update before mounting the device. Add a supported storage card or activate a recording plan only if you want or need that option.
Tip:Do not share your account password with household members. Use the app’s household-sharing feature and give each person only the access they need.
Check: The camera appears in the app, any required update is complete, and you can open its live view.
Step 4: Set up recording and notification preferences
Use the app to choose whether the camera records continuously, records motion events, or follows a schedule. Set motion zones around the area you need to monitor and exclude busy roads, swaying trees, or other sources of repeated unwanted alerts when possible. Choose alert settings that match the camera’s location and your routine. If the camera supports person, package, or vehicle detection, test those categories rather than assuming the labels will suit your needs. Set the correct time zone and check how long clips are stored.
Tip:Start with motion alerts enabled for the key area, then adjust after observing real activity. Overly broad zones can create many alerts and make useful events easier to miss.
Check: The camera has a defined recording mode, useful detection area, notification settings, and a storage method you understand.
Step 5: Mount and aim each camera
Place the camera temporarily at the planned height and open its live view. Aim it to include the intended approach or area without pointing into private spaces or directly at bright lights. Check the daytime image and, if possible, the night or infrared view. Once the view is right, use the included mount and hardware suitable for the wall or surface. Follow the maker’s instructions for drilling, anchors, and weather sealing. Secure the camera, route its cable safely, and keep access to reset buttons and removable storage in mind.
Tip:Do not mount a camera until you have confirmed the image and Wi-Fi connection from that exact position. Avoid placing it behind glass if you need night vision; infrared light can reflect off the glass and obscure the image.
Check: The camera is firmly fixed, its view covers the intended area, and its power cable or battery can be reached safely for maintenance.
Step 6: Test live view, recordings, and alerts
Open live view from your phone while connected to home Wi-Fi, then test again using cellular data if you expect remote access. Walk through the motion zone at different distances and confirm that the camera records an event and sends the expected alert. Open the resulting clip and check that it plays, has the right time, and shows enough detail to identify the event. Test at night as well if the camera will be used after dark. Repeat these checks for every camera.
Tip:Keep the phone’s notification permission enabled for the camera app. A correctly configured camera may record events while the phone blocks alerts at the operating-system level.
Check: You can view each camera remotely, retrieve a recent recording, and receive alerts for activity in the selected zone.
Step 7: Review access and document the setup
Open the app’s account and sharing settings. Remove any test users or devices you no longer use, review who can view or download footage, and confirm two-factor authentication remains enabled. Save the camera locations, Wi-Fi requirements, storage plan, and reset instructions somewhere secure. Ask household members to test their own authorized access and explain how to pause recording if the system provides that control.
Tip:Check for firmware updates periodically and after security notices from the manufacturer. Replace default passwords or access codes if the camera or hub came with them.
Check: Only intended users have access, household members know how the cameras operate, and you can find setup and recovery details.
Common Mistakes to Avoid
- Mounting a camera before checking the live view and Wi-Fi signal at its final position. — Test the camera temporarily at the proposed spot, then confirm image quality and connection before drilling or fixing the mount.
- Pointing the camera at a street, moving trees, or bright lights, which causes false alerts or poor footage. — Aim at the access point or specific area you need, set motion zones, and review daytime and nighttime views.
- Using a weak, reused, or default account password. — Choose a unique password, enable two-factor authentication, and grant household access through the app rather than sharing your login.
- Assuming a camera saves footage just because live view works. — Check the recording mode and storage requirements, then trigger an event and open the saved clip as a test.
Troubleshooting
Problem: The camera will not connect to Wi-Fi during setup.
Solution:
Confirm the network password and check whether the camera requires 2.4 GHz Wi-Fi. Move the camera closer to the router for pairing, restart the router and camera, and retry using the app’s setup instructions. If the router combines bands under one network name, check the camera maker’s guidance for setup on that network.
Problem: The camera goes offline after mounting.
Solution:
Check that its power supply is connected and, for a battery model, that the battery is charged. Compare the signal at the mounted position with the temporary test location. Move the camera closer to the router or add a compatible mesh node or range extender, then reconnect it according to the app instructions.
Problem: The camera records events but sends no phone alerts.
Solution:
Check the camera’s notification settings in the app, your phone’s notification permissions, and any quiet-time or focus mode settings. Confirm the motion zone includes the test path, then trigger another event. If alerts still fail, update the app and restart the phone and camera.
Problem: Night footage is washed out, dark, or hard to identify.
Solution:
Adjust the angle to avoid a nearby wall or reflective surface, clean the lens, and check that infrared night vision is enabled. Move the camera away from glass and direct light sources. Test again after dark, and add suitable outdoor lighting if the camera needs more visible light.
What Success Looks Like
The setup is complete when every camera remains online in its intended location, shows the correct area without unnecessary private coverage, and records retrievable footage. You can open live view both at home and remotely if remote access is part of your plan, and a test motion event produces the expected clip and phone alert. Account access is limited to intended users, and you know how recordings are stored and how long they remain available.
Next Steps
Check the cameras after the first few days and adjust motion zones or alert frequency based on actual events. Test each camera monthly by opening live view and playing a recent clip; check battery level, lens cleanliness, mounts, cables, and storage at the same time. Review user access whenever someone leaves the household, and install firmware updates from the official app. If a camera repeatedly loses power or connection, consult the maker’s support before replacing hardware or changing router security settings.
Frequently Asked Questions
Do smart home cameras need 2.4 GHz Wi-Fi?
Some models require 2.4 GHz, while others support both 2.4 GHz and 5 GHz. Check the camera’s specifications before setup. A phone can connect to a different band from the camera, but the camera still needs a compatible band and adequate signal at its location.
Can I install a security camera without drilling?
Many indoor cameras can sit on a shelf, and some models support approved adhesive mounts or other non-drill options. Use only mounts recommended for the camera and surface. For outdoor placement, confirm that the mount can hold securely and protect the device as its instructions require.
Will the camera record if the internet goes down?
It depends on the model and its storage options. Some cameras can save footage to local storage or a hub during an internet outage; others rely on cloud service and may stop recording or remote access. Check the manufacturer’s outage and storage documentation, then test the behavior if local recording matters to you.
Do I need a paid subscription?
Not always. Some cameras offer live view and local recording without a subscription, while cloud recording, longer clip history, or advanced detection may require a paid plan. Read the storage and feature details before buying, and verify that your selected recording method is active in the app.
How high should I mount a camera?
Use the manufacturer’s placement guidance and test the view before fixing the mount. A higher position can cover a wider area but may make faces and details harder to identify. Choose a height that captures the intended activity clearly and is still reachable for cleaning, charging, or maintenance.
Fall yard work Picks
leaf blowers
As an affiliate, we earn on qualifying purchases.