Mastering milk texture is the key to beautiful latte art, not magic. To get perfect microfoam, focus on steaming milk to 140–150°F, keeping the wand just below the surface, and using steady pitcher movements. Avoid common mistakes like overheating or large bubbles, and use tools like a thermometer and narrow-spout pitcher for better control. Keep practicing these tips, and you’ll discover simple tricks that take your latte art to a professional level. If you want to know more, stay tuned.
Key Takeaways
- Achieve glossy, silky microfoam by steaming milk to 140–150°F with steady wand positioning.
- Keep milk temperature consistent and avoid overheating to maintain proper texture.
- Use a narrow spout pitcher and controlled pouring techniques for precise latte art.
- Incorporate gentle frothing to create fine, uniform microbubbles essential for stable foam.
- Practice steady pitcher movement and microfoam flow to produce clean, well-defined latte art designs.
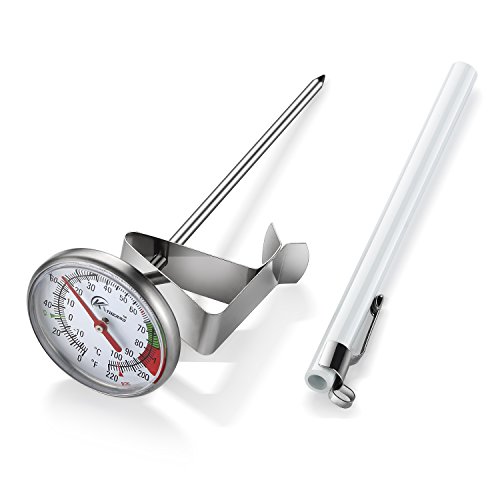
KT THERMO Instand Read 2-Inch Dial Thermometer,Best for The Coffee Drinks,Chocolate Milk Foam
- Multi-stage clip design: Adjusts for easy temperature reading
- Safe, simple measurement: Accurately measures coffee and milk foam
- Wide temperature range: 0°F to 220°F for various liquids
As an affiliate, we earn on qualifying purchases.
As an affiliate, we earn on qualifying purchases.
Why Milk Texture Is Key to Stunning Latte Art

The quality of your milk texture directly impacts the success of your latte art because it determines how well you can create smooth, velvety patterns on the surface. Foam stability is essential here—stable foam holds its shape without collapsing, allowing you to craft sharp, clean designs. Milk viscosity also plays a critical role; properly textured milk has the right thickness to flow smoothly and form consistent microfoam. When your milk has good foam stability and the right viscosity, you’ll find it easier to pour controlled, well-defined designs. Achieving consistent texture is key to replicating professional-quality latte art every time. Poor texture results in unstable foam that breaks apart or spreads unevenly, ruining your artwork. Focusing on achieving ideal milk viscosity and foam stability sets the foundation for stunning, professional-looking latte art. Additionally, understanding how projector technology influences image quality can help you better appreciate the importance of precise control—much like perfecting milk texture is essential for excellent latte art. Proper technique and milk steaming methods are crucial in reaching that ideal texture, ensuring your microfoam remains stable and glossy.
How to Steady Your Milk for Smooth Microfoam

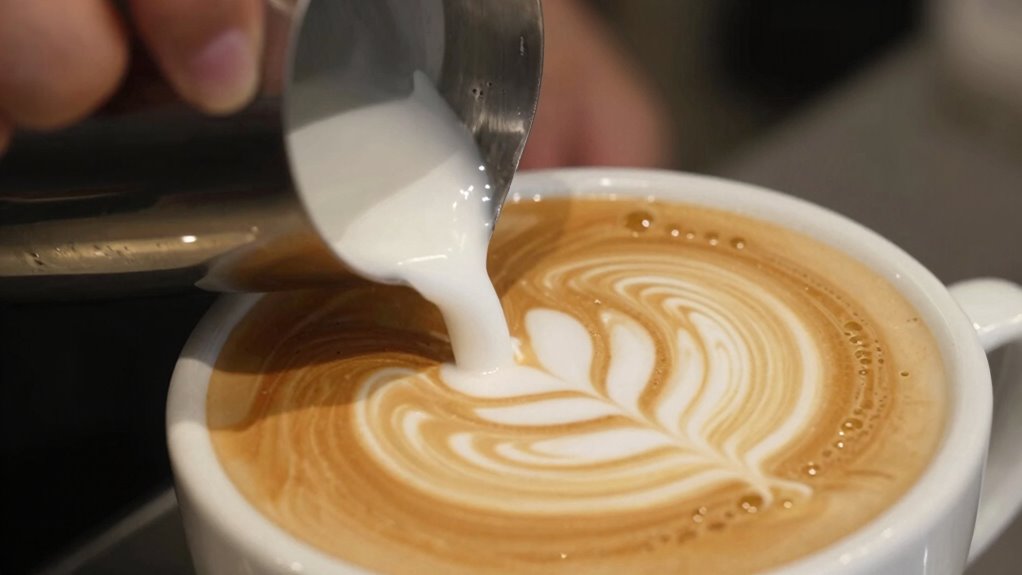
Achieving steady milk for smooth microfoam starts with proper pouring techniques and consistent steaming. Foam stability depends on how well you control the milk’s temperature and texture. Aim to keep the milk between 140–150°F (60–65°C), which promotes ideal foam stability without scorching the milk. Use a steady hand to keep the steam wand just below the surface, creating fine, velvety microfoam. As you steam, listen for a gentle hissing sound, indicating consistent aeration. Keep the pitcher steady and avoid abrupt movements that can introduce large bubbles or uneven texture. Properly heated, well-steamed milk will have a glossy appearance and a silky feel, making it easier to pour smoothly and create those intricate latte art designs.
Common Milk Mistakes and How to Fix Them

Many common milk mistakes stem from rushing the steaming process or neglecting proper technique, which can result in uneven textures and poor microfoam. To fix this, focus on your milk temperature and frothing techniques. Overheating milk leads to a burnt taste and broken microfoam, while underheating results in flat foam. Ensure you’re steaming milk to around 140-150°F. Use smooth, controlled motions to incorporate air and create fine microbubbles. Here’s a quick guide:
| Mistake | Fix |
|---|---|
| Overheating milk | Monitor temperature with a thermometer |
| Underfrothed milk | Adjust frothing angle and incorporate more air |
| Uneven texture | Keep the pitcher steady and aim for consistent movement |
| Large bubbles | Use gentle, steady frothing techniques |
| Poor microfoam | Practice controlling your milk’s flow and temperature |
Consistently practicing proper frotting techniques helps develop better control and results. Additionally, understanding the importance of milk texture can greatly improve your latte art skills. Developing an awareness of microfoam quality is essential for achieving smooth, silky latte art. Regularly paying attention to milk steaming details can help prevent common issues and elevate your barista game.
Essential Tools and Tips for Perfect Microfoam

What tools do you need to create perfect microfoam? First, invest in a good espresso machine with a steam wand designed for milk steaming techniques**. A stainless steel pitcher with a narrow spout helps you control the milk flow, making it easier to create fancy latte designs. A thermometer isn’t essential but can help you master milk temperature, ensuring your microfoam is just right. Using fresh, cold milk for steaming yields better texture and consistency. As you steam, focus on the technique — position the wand correctly and introduce air gradually. Proper steam wand design can enhance your ability to produce smooth, glossy microfoam, ideal for pouring intricate latte art. Additionally, practicing consistent steaming techniques will significantly improve your results. Developing a steady steaming rhythm** is key to achieving the perfect microfoam texture. These tools and tips help you achieve smooth, glossy microfoam, ideal for pouring intricate latte art. Mastering milk steaming techniques transforms simple milk into a canvas for your creative, fancy latte designs.
Quick Hacks to Improve Milk Texture Without Extra Equipment
Even without extra equipment, you can substantially boost your milk texture by focusing on your steaming technique and milk preparation. Start by warming your milk to the right temperature, around 140°F, to enhance frothing consistency. Use proper milk frothing techniques: keep the steam wand just below the surface to introduce air gradually, then submerge it deeper to create smooth microfoam. Experiment with alternative milk options like oat, almond, or soy milk, which can froth differently but still produce good texture. Shaking or swirling the milk container before steaming helps eliminate bubbles and promote uniform microfoam. Consistent practice with these simple adjustments will improve milk texture over time, making your latte art sharper and more professional-looking, even without investing in extra equipment.
Troubleshooting Milk Texture Problems in Your Latte Art

When your latte art doesn’t turn out as smooth or detailed as you’d like, the problem often lies in the milk texture. Poor texture can result from incorrect milk temperature or steaming technique. If the milk is too hot or too cold, it won’t foam properly, leading to flat or stringy designs. Similarly, a flawed steaming technique can cause uneven microfoam, making pouring difficult. To troubleshoot:
- Ensure your milk temperature is around 140-150°F for ideal microfoam.
- Use a proper steaming technique—start with a gentle stretch, then create a whirlpool to incorporate air evenly.
- Check your pitcher angle and positioning to achieve consistent, velvety microfoam.
- Understanding milk texture and how it impacts latte art can help you make targeted improvements. Practicing milk steaming techniques regularly allows for better control over the microfoam quality and consistency.
Refining these aspects will help you craft smoother, more precise latte art.
Frequently Asked Questions
Can Non-Dairy Milks Produce Good Latte Art Textures?
Yes, non-dairy alternatives can produce good latte art textures if you use proper milk frothing techniques. You should choose options like oat or soy milk, which have better frothing qualities, and focus on steaming them to create a silky, microfoam. Practice makes perfect, and adjusting your technique based on the specific non-dairy milk helps you achieve smooth, glossy textures ideal for latte art.
How Does Milk Temperature Affect Microfoam Quality?
Think of milk temperature control like tuning a musical instrument. When you milk froth at the right temperature, around 140-150°F, microfoam becomes silky and stable, much like a well-tuned instrument producing perfect notes. Too hot, and the proteins break down, ruining the microfoam. I once overshot by a few degrees, and the foam lost its shine. Proper temperature regulation guarantees your milk frothing creates ideal microfoam for stunning latte art.
What’s the Best Way to Store Milk for Optimal Texture?
Store your milk in the coldest part of your fridge, ideally at or below 4°C, to preserve its freshness and maintain ideal microfoam quality. Keep it in a sealed container to prevent absorption of odors and contamination. Avoid leaving milk out at room temperature for extended periods, as this can compromise texture and freshness. Proper milk storage helps guarantee your microfoam stays smooth, fresh, and perfect for latte art.
Do Different Coffee Beans Influence Milk Texture?
Think of coffee beans as the foundation of a house—your milk’s texture builds on it. Different coffee bean influence and bean roasting effects can subtly affect how well milk froths, with darker roasts often producing a richer foam. Light roasts might create a lighter texture. So, yes, the type and roast level of your beans impact milk’s ability to develop that silky microfoam essential for perfect latte art.
How Long Can I Keep Steamed Milk Before It Goes Bad?
You should use steamed milk within two hours to prevent milk spoilage and preserve freshness. After steaming, bacteria can start to grow, making it unsafe to drink if left out too long. To keep it fresh, store leftover milk in the refrigerator and reheat only what you need. Always smell and check for sourness before using, as proper freshness preservation is key to ensuring quality and safety.
Conclusion
Mastering milk texture turns your latte art from a simple pour into a mesmerizing masterpiece—like painting with clouds. With the right techniques and a bit of practice, you’ll elevate your coffee game to legendary status. Remember, perfect microfoam isn’t magic; it’s the result of patience and precision. Keep experimenting, stay curious, and soon you’ll create latte art so stunning, it’ll make even baristas do a double take. Your next coffee masterpiece awaits—go make magic!